← All software
Minecraft 1.21.11 & 26.3 · NeoForge · Preview

Lensbridge

Place cameras, fly a drone, run rails and orbits, and record smooth, real-time video. Lensbridge also runs a local connection that AI assistants like Claude can use to set up shots, check how your build looks and shoot promo footage for you. Every video on this page and the Mothlight page was shot with it.

Screenshots
What it does

Behind the scenes

Every shot of Mothlight on this site was set up and filmed with Lensbridge. Here's the crew at work.

  • Show your cameras in the world with Alt+P: tripods, the drone and camera rails appear as props.
  • Only the cameras you choose see the props; your real shots stay clean, and a camera never films itself.
  • Props exist only on your computer. Servers and other players never see them.
Your cameras, in the world

Press Alt+P and every camera shows up where it stands: tripods as cameras on legs, the drone with spinning rotors.

  • See at a glance where your cameras are and which way they point.
  • Perfect for behind-the-scenes shots of your own setup.
  • Your real shots never show them, and a camera never films itself.

A physics drone

Fly it yourself with Alt+D, or let it fly itself.

  • Inertia, banking and a stabilised gimbal, so the footage moves like a real drone.
  • Follow, orbit, reveal, dronie, top-down and FPV modes, or waypoint missions.
  • Your character stays where it is while you fly.

Tripods and multicam

Drop a camera where you stand with Alt+T and cycle through them with Alt+N.

  • Record the same moment from every enabled tripod, one synced video per angle.
  • Groups, on/off switches and thumbnails in the Camera Manager.
  • Take control of any camera to fine-tune the angle, then save it.

Rails, orbits and turntables

Smooth, repeatable camera moves rendered frame by frame.

  • Spline rails, dolly moves, orbits and target locks that follow moving mobs.
  • Turntables find where a model really is and frame it automatically.
  • Rendered at 60 fps with interpolated animation, so nothing stutters.
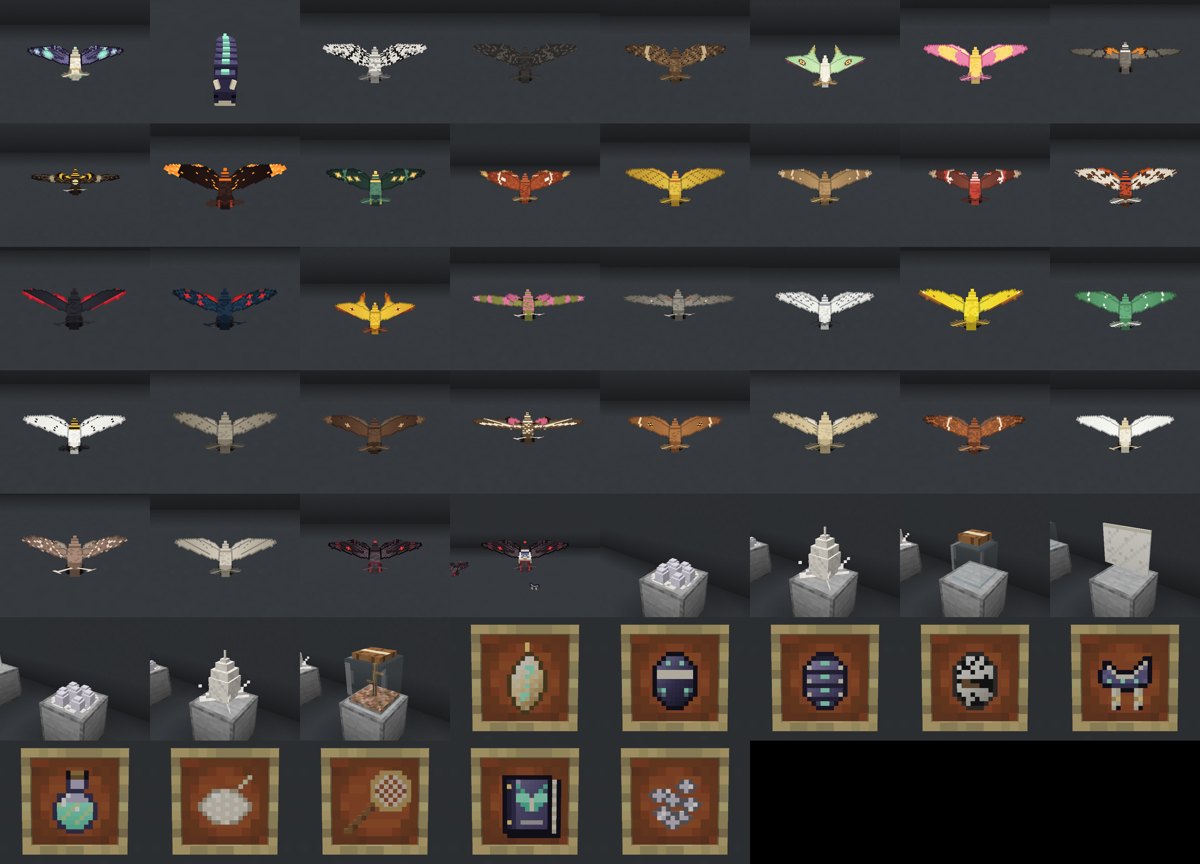
A contact sheet of every Mothlight moth, block and item, shot automatically

Showcase Stages, for modmakers

Ask your assistant to make a showcase of your mod, and get a picture of everything in it.

  • Reads your mod's mobs, blocks and items and builds a clean stage for them in the sky.
  • Frames and photographs every exhibit, plus a contact sheet, an index page and optional turntables.
  • This is every Mothlight mob, block and item: 53 pictures in about a minute and a half.
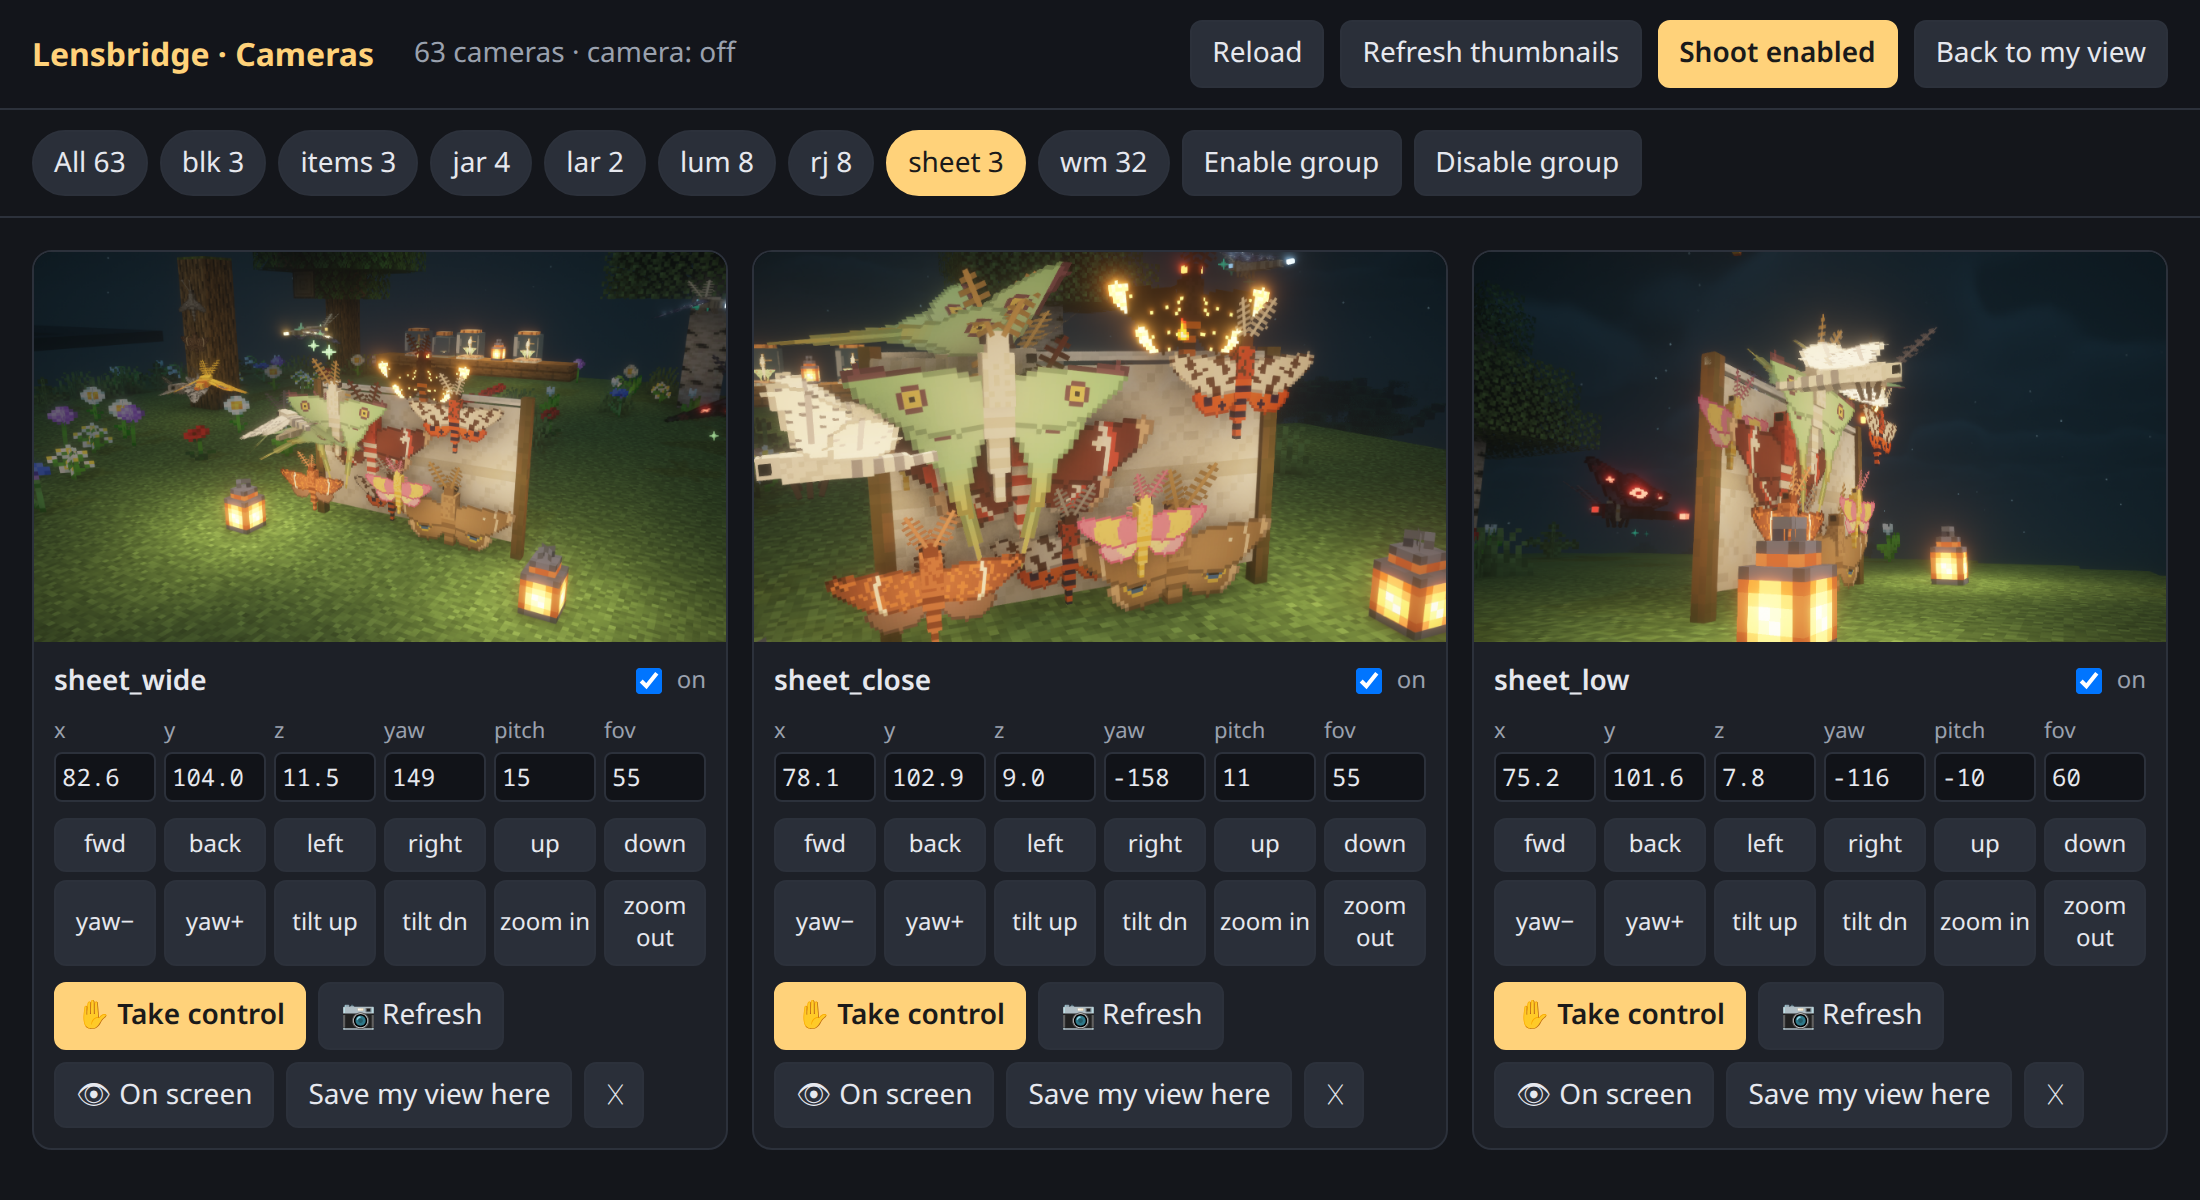
The Camera Manager with three cameras and their thumbnails

The Camera Manager

A browser page on your own computer (Alt+C) with every camera, its view and its controls.

  • Nudge position, angle and zoom with live thumbnails.
  • Shoot stills from every enabled camera at once.
  • Back to my view, or Esc, always returns you to your own eyes.

An AI camera crew

Lensbridge speaks MCP, so assistants like Claude can see the game and run the cameras.

  • Game-only screenshots: never your desktop or other windows.
  • Stage scenes, set the light, freeze the world and shoot stills, orbits and drone shots.
  • Local only, behind a secret token; the assistant's cameras render out of sight unless you want to watch.
How to install

There is a build for Minecraft 1.21.11 and one for Minecraft 26.3: download the one that matches your game. The steps below use 1.21.11; for 26.3, pick 26.3 instead (NeoForge 26.3.x needs Java 25, which the launchers set up for you).

1. Get Minecraft 1.21.11 with NeoForge

Pick the launcher you use. Each one sets up NeoForge for you.

Prism Launcher

  • Add Instance → Minecraft 1.21.11 → Mod loader NeoForge (latest) → OK.
  • Right-click the new instance → Folder, then open the mods folder (create it if it isn't there).

CurseForge app

  • Minecraft → Create Custom Profile → version 1.21.11, loader NeoForge → Create.
  • On the profile, click ⋯ → Open Folder, then open mods.

Modrinth App

  • + (Create instance) → 1.21.11, loader NeoForge → Create.
  • Open the instance → ⋯ → Open folder, then open mods.

Official Minecraft launcher

  • Download the NeoForge installer for 1.21.11 (21.11.x) from neoforged.net and run it → Install client.
  • Start the neoforge profile once in the Minecraft launcher, then close the game.
  • Open your .minecraft/mods folder: %APPDATA%\.minecraft\mods on Windows, ~/Library/Application Support/minecraft/mods on macOS, ~/.minecraft/mods on Linux.

2. Add Lensbridge

  • Click Download latest build on this page and put lensbridge-<version>.jar in that mods folder. Don't unzip it.
  • It goes on your game. Servers don't need it. In single player everything works; on a server, the free cameras and letting an AI act for you need operator status unless the server owner allows them (server owners can install the same jar to set the rules; see the wiki, "Playing on servers").

3. Install ffmpeg (for video)

Pictures work without it; videos need it.

  • Windows: open Terminal and run winget install Gyan.FFmpeg
  • macOS: brew install ffmpeg
  • Linux: install ffmpeg with your package manager.
  • Restart Minecraft afterwards so it finds ffmpeg.

4. Try it

  • Start the game and join a world. Press Alt+T to place a camera, Alt+N to look through it, Alt+D to fly the drone, Alt+R to record, Alt+C for the Camera Manager, Esc to get back to your own view.
  • The full guide is inside the mod: Help in the Camera Manager.

5. Connect an AI assistant (optional)

  • Lensbridge creates a secret key (the token) the first time it runs. It keeps other programs on your computer from controlling your game; nothing on the internet can reach it.
  • Easiest: open the Camera Manager (Alt+C) and click Copy connect command. For Claude Code, paste it into a terminal and press Enter.
  • Other assistants: connect to http://127.0.0.1:25599/mcp with the header Authorization: Bearer <token>. The token is in config/lensbridge.json inside your instance folder.
  • Once connected, just ask: "place three cameras around my build", "orbit my house at sunset". The assistant reads Lensbridge's guide by itself.